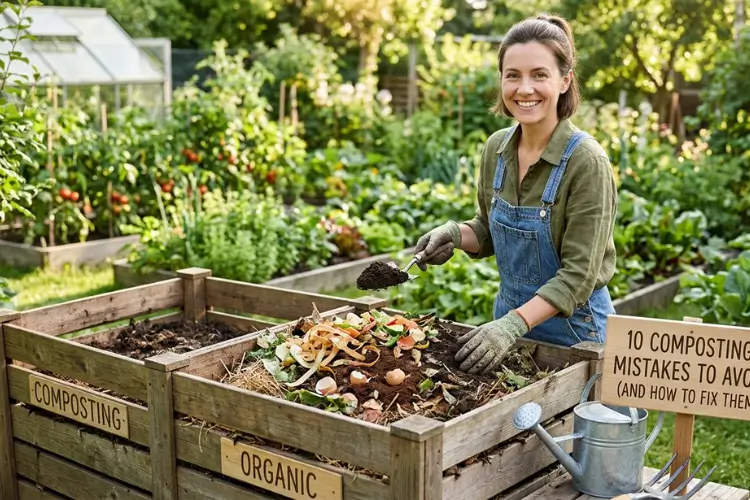
The most common composting mistakes are getting the greens-to-browns ratio wrong, letting the pile get too wet or too dry, and cutting off oxygen. Aim for about 3 parts browns to 1 part greens by volume, keep the pile as damp as a wrung-out sponge, and build it at least 3 feet wide, deep and tall. Most smelly, slimy or stalled piles recover within 1 to 2 weeks once those three things are fixed.
TL;DR: The 10 mistakes (and the fast fix for each)
- Too many greens → Add shredded leaves or cardboard.
- Too many browns → Add grass clippings, coffee grounds or food scraps.
- Too wet or too dry → Use the squeeze test. One or two drops is perfect.
- No oxygen → Turn it, or add coarse browns for air pockets.
- Pile too small → Build to at least 3 x 3 x 3 feet.
- Wrong materials → No meat, dairy, oils, pet waste or diseased plants.
- Trusting “compostable” labels → Most need an industrial facility.
- Exposed food scraps → Bury every addition under browns.
- Big, whole pieces → Chop, shred or mow first.
- Using compost too early → Wait until it smells like forest soil.
Pile smells or won’t heat up? Jump to the quick diagnosis table.
My first compost pile smelled like a dumpster in July.
I’d bought a cheap plastic bin, set it behind the garage, and started tossing in every banana peel, onion skin and leftover salad we had.
For about two weeks, I felt amazing about it.
Then I lifted the lid.
The smell hit me before I could even look inside. A sour, slimy, black mess. And a cloud of fruit flies that followed me back to the kitchen door.
I was doing everything “right.” Saving every scrap. Feeling good about keeping food out of the landfill.
And still, I’d built the neighborhood’s worst-smelling science experiment.
Here’s the truth nobody tells you:
Composting almost never fails because it’s hard. It fails because of a few small, fixable mistakes.
And they’re the same mistakes almost everyone makes.
So in this guide, I’ll walk you through the 10 I see most often (including the ones I made myself), what each one looks like in a real pile, and exactly how to fix it.
No fancy gear. No hype. Just what actually works.
Brand new and haven’t set up a bin yet? Start with my guide to composting food scraps at home, then come back here.
What’s Wrong With My Compost? (Quick Diagnosis Table)
Most compost problems can be diagnosed by one symptom: how the pile smells, looks or feels. Find yours below, then jump to the fix.
| Symptom | Likely cause | Quick fix | Typical recovery |
| Smells like ammonia | Too many greens (Mistake #1) | Mix in shredded leaves or cardboard, then turn | 3 to 7 days |
| Smells like rotten eggs or sour | No oxygen, often too wet (Mistakes #3, #4) | Turn thoroughly and add dry, coarse browns | 1 to 2 weeks |
| Slimy and matted | Too wet plus too many greens (Mistakes #1, #3) | Fork in shredded cardboard or straw | 1 to 2 weeks |
| Pile stays cold | Too small, too dry or too many browns (Mistakes #2, #3, #5) | Build to 3 x 3 x 3 feet, add greens and water | 3 to 7 days |
| Dry and dusty, nothing happening | Too dry (Mistake #3) | Water while turning until it passes the squeeze test | A few days |
| Fruit flies everywhere | Exposed food scraps (Mistake #8) | Bury scraps 6 to 8 inches under browns | A few days |
| Rats, raccoons or dogs digging | Meat, dairy or oily food; open base (Mistakes #6, #8) | Remove attractants, add hardware cloth under the bin | Ongoing |
| White, cobweb-like threads | Nothing wrong! Beneficial fungi and actinomycetes | Leave it alone | N/A |
| Big chunks still there after months | Pieces too large (Mistake #9) | Sift, chop and return chunks to the pile | Next batch |
| Plants curl or twist after using compost | Herbicide contamination (Mistake #6) | Run a bean test, stop using that source | N/A |
The 4 Things Every Compost Pile Needs
Every healthy compost pile needs the right balance of four things: carbon, nitrogen, water and air. Get these roughly right and almost any pile will turn into finished compost.
Composting is controlled aerobic decomposition, in which bacteria and fungi break down organic matter into a stable soil amendment.
By the way:
Worms are a bonus, not a requirement. Bacteria and fungi do most of the work.
Here’s what those microbes need:
- Carbon (“browns”): Dry leaves, straw, shredded cardboard, paper, wood chips. This is their energy source.
- Nitrogen (“greens”): Food scraps, coffee grounds, fresh grass clippings, plant trimmings. This builds their bodies and lets them multiply fast.
- Water: Enough to feel like a wrung-out sponge.
- Air: Microbes that make good compost breathe oxygen. Take it away and a different, smellier crew takes over.
According to the UC Master Gardener Program, the most effective mix is about 30 parts carbon to 1 part nitrogen (a 30:1 C:N ratio).
You don’t need a lab to hit it. Two to three buckets of browns for every bucket of greens gets you close.
Composting is controlled decomposition. Rotting is what happens when you lose control of the oxygen.
Every mistake below breaks one of these four rules.
The 10 Most Common Composting Mistakes (And How to Fix Each One)
These are the 10 mistakes behind almost every smelly, slow or pest-filled compost pile, in order of how often they show up.
Mistake #1: Too Many Greens (Why Your Compost Smells)
Adding too many greens is the number one reason compost smells bad. Excess nitrogen escapes as ammonia gas, and wet green scraps pack down and squeeze out oxygen.
It’s the most natural mistake in the world.
Because: You make food scraps every single day. Browns? Those come in once a year when the leaves fall.
So kitchen scraps pile up, and the balance quietly tips.
Signs you’re making this mistake
- A sharp ammonia smell (like cleaning products or cat litter)
- A slimy, dark green or black layer
- Clumps that stick together instead of crumbling
How to fix it
- Add browns right away. Mix in 2 to 3 buckets of shredded leaves, straw or torn cardboard for every bucket of scraps already in there.
- Turn the pile so the new browns get mixed through, not just piled on top.
- Stockpile browns in autumn. Bag up fallen leaves and keep them next to your bin for the whole year.
- Keep a “brown bucket” by the bin. Every time you dump scraps, add a scoop of browns. No thinking required.
From my pile: That smelly first bin? It was almost 100% kitchen scraps. Zero browns.
I raked up the neighbor’s leaves (they were happy to get rid of them), ran them over with the lawn mower, and forked three big buckets into the mess.
Within a week, the ammonia smell was gone.
Now I keep a bag of shredded leaves right beside the bin all year. It’s the single habit that changed everything for me.
A compost pile that smells is almost always telling you one of two things: too much nitrogen or too little oxygen.
Mistake #2: Too Many Browns (Why Your Pile Won’t Heat Up)
A pile with too many browns breaks down very slowly because the microbes run short of nitrogen. It won’t smell. It just sits there.
This is the opposite problem.
And honestly? It’s the “safer” mistake. Nothing stinks. Nothing attracts pests.
But:
You could be waiting two years for compost you could have had in a few months.
Signs you’re making this mistake
- The pile never gets warm in the middle
- Leaves look almost the same after months
- Everything is dry, light and fluffy
How to fix it
- Add a nitrogen boost. Fresh grass clippings, coffee grounds (many coffee shops give them away free) or a bucket of kitchen scraps.
- Water as you mix. Dry browns are often too dry as well.
- Watch out for oak leaves. NC State Extension notes oak leaves sit around a 60:1 C:N ratio and are high in tannins, so they break down far more slowly than maple leaves. Shred them and mix them with plenty of greens.
Quick number: A pile at 30:1 decomposes faster and hotter than one at 60:1, according to UNH Extension.
Mistake #3: Letting the Pile Get Too Wet or Too Dry
Compost needs roughly 40% to 60% moisture, about as damp as a wrung-out sponge. Too wet and the pile turns anaerobic and smelly. Too dry and the microbes simply stop working.
This one sneaks up on you with the weather.
A rainy month drowns an open pile. A hot, sunny summer bakes it dry.
From my pile: I left my open pile uncovered through one very wet spring. By May, the bottom half was a dense, dripping sludge that smelled like a swamp.
An old tarp and a few armloads of straw fixed it in about two weeks. The tarp has stayed on ever since.
The simple fix? The squeeze test.
Grab a handful from the middle of the pile and squeeze hard.
| What happens | What it means | What to do |
| Water streams out | Too wet | Add dry browns, turn, cover from rain |
| One or two drops | Perfect | Nothing! |
| Crumbles, no moisture | Too dry | Water while turning, layer by layer |
NC State Extension uses exactly this benchmark: if a drop or two comes out, you’re in range.
How to fix it (and prevent it)
- Cover the pile with a tarp, lid or thick layer of straw in rainy climates.
- Water dry piles while you turn them, not just on top. Surface water runs off.
- Pick a smarter spot. Partial shade is ideal. Full sun dries a pile fast, and deep shade keeps it cold.
- Adjust for your climate. In dry regions, use a closed bin to hold moisture. In humid or rainy regions (think the Pacific Northwest or the UK), add extra browns to soak up water.
Mistake #4: Starving the Pile of Oxygen
When a pile runs out of oxygen, it switches from composting to rotting. That’s when you get the rotten-egg and sour smells most people blame on composting itself.
Anaerobic compost is simply a pile that has run out of air.
It usually happens because the pile is compacted, soggy or full of flat, matted material (like wet grass clippings or wet paper).
Signs you’re making this mistake
- A rotten-egg or sour, vinegar-like smell
- A dense, heavy, wet core
- Grass clippings forming a slimy mat
How to fix it
- Turn it. Use a garden fork to flip the outside to the middle and fluff everything up.
- Add coarse browns. Straw, small twigs and crumpled cardboard create air pockets that last.
- Never dump grass clippings in a thick layer. Mix them in or let them dry first.
- Start new piles on a base of twigs. A few inches of sticks at the bottom helps air flow and drainage.
Here’s the part other guides skip:
Turning speeds compost up. It isn’t required for compost to happen.
If you’re happy to wait 6 months to 2 years, a “cold” pile you never turn will still get there. Turning just gets you there faster and keeps smells away.
Mistake #5: Building a Pile That’s Too Small
A compost pile needs to be at least 3 feet wide, deep and tall (about 1 cubic yard) to hold heat. Smaller piles lose heat as fast as the microbes make it, so they stay cold and slow.
This is why so many small backyard bins seem to do nothing.
Nebraska Extension gives the rule of thumb: minimum 3 x 3 x 3 feet to hold heat, and no more than about 5 feet tall and wide, so air can still reach the center.
From my pile: For a full year, I added a few scraps at a time to a small bin and wondered why it never got warm.
Then one fall, I saved up leaves and scraps for three weeks and built a proper 3-foot pile in a single afternoon.
Four days later, I pushed my hand into the middle and actually pulled it back. It was hot. Steam rose off it on cold mornings.
Same materials. Different size. Completely different result.
How to fix it
- Collect materials until you can build a full pile at once. Store browns in bags and keep scraps in a lidded bin until you have enough.
- Combine small piles into one bigger one.
- Don’t go giant. A 7-foot mountain goes anaerobic in the middle.
- Accept a slow pile if space is tight. A small bin still works. It just works on a longer timeline. (Or try a worm bin instead. More on that below.)
Mistake #6: Adding the Wrong Materials
Some organic materials cause more problems than they solve: meat, dairy, oils, pet waste and diseased plants should stay out of a home compost pile. They attract pests, create odors or spread pathogens a backyard pile may not get hot enough to kill.
“It’s natural, so it can go in” is one of the most common beginner assumptions.
Not quite.
Never compost these at home
| Material | Why it’s a problem |
| Meat, fish, bones | Attracts rats, raccoons and dogs; smells as it breaks down |
| Dairy, grease and cooking oils | Odors, pests, and oils coat materials and slow breakdown |
| Dog and cat waste | Can carry parasites and pathogens harmful to people |
| Diseased or pest-infested plants | Can spread disease back into your garden |
| Weeds that have gone to seed | Most home piles don’t get hot enough to kill seeds |
| Treated or painted wood, sawdust from it | Chemical residues |
| Coal or charcoal ash | Can contain sulfur and other contaminants |
| Glossy or coated paper | Coatings and inks you don’t want in your soil |
Totally fine (despite the myths): Moldy food, citrus peels in moderation, crushed eggshells, coffee filters, tea leaves (check your tea bags for plastic), and manure from plant-eating animals like chickens, rabbits, horses and cows.
The hidden risk: herbicide-treated grass, hay and manure
This is the mistake almost nobody talks about.
Some weed killers used on lawns, pastures and hay fields (like aminopyralid, clopyralid and picloram) are extremely persistent. They survive the composting process. They can even pass through an animal’s gut and stay active in its manure.
The result? Compost that twists, curls and stunts tomatoes, beans, peppers and potatoes.
From my pile: A friend with horses once gave me a truckload of “free” manure. I composted it, spread it on my vegetable beds, and felt very proud of myself.
Three weeks later, my tomato leaves were curling into tight little cups, like fiddleheads. The beans came up twisted.
The horses had been eating hay from a field sprayed with a persistent herbicide. It went straight through them, through my compost, and into my garden.
I lost most of that season. Now I test every outside source before it touches my beds.
If you’re growing an organic garden at home, this one matters even more.
How to protect your garden:
- Ask before you accept grass clippings, hay, straw or manure from anyone else.
- Run a simple bean test. Plant a few bean seeds in a pot of your compost mix and a few in plain potting mix. If the compost seedlings come up with cupped, twisted leaves, don’t use that batch on your vegetables.
- Don’t compost your own clippings for several weeks after using a broadleaf weed killer on your lawn. Check the product label for specific guidance.
Mistake #7: Trusting “Compostable” Labels in a Home Bin
Most products labeled “compostable” are designed to break down in industrial composting facilities, not in a backyard pile. Industrial sites run hotter and more consistently than any home system.
I fell for this one hard.
After a backyard party, I tossed a whole bag of “compostable” forks and cups into my pile. I figured I was being a zero-waste hero.
A year later, I sifted that batch.
The forks were still there. Slightly dull. Completely intact. I could have washed one off and eaten dinner with it.
“Compostable” cups, cutlery and takeout containers look like a zero-waste win. It’s one of the most common zero waste myths out there.
But:
Many of them are made from plastics like PLA, which need sustained high temperatures to break down. In a home pile, they can sit there looking almost new for a very long time.
A “compostable” label usually means compostable in an industrial facility, not in your backyard bin.
How to fix it
- Look for “home compostable” specifically. Certifications like BPI (in the US) generally mean industrial composting unless the product clearly says home compostable.
- Send certified compostables to municipal or commercial compost programs if your city accepts them.
- Better yet, skip them. A reusable fork beats a compostable one every time, and it’s one of many simple zero waste swaps that cut waste at the source.
- Plain paper and cardboard are the exception. Unwaxed, uncoated paper products break down just fine at home.
Mistake #8: Leaving Food Scraps Exposed (Pests and Flies)
Food scraps left on the surface of a pile attract fruit flies, rodents and other animals. Burying every addition under a layer of browns solves most pest problems overnight.
From my pile: One summer morning, I found my compost scattered across half the backyard. Corn cobs, melon rinds, eggshells everywhere.
A raccoon had found the leftover chicken skin I’d “just this once” thrown on top.
Lesson learned. Nothing goes on the surface anymore, and nothing with meat goes in at all.
So where do you start?
With one simple habit.
How to fix it
- Dig a hole in the middle of the pile and drop scraps in, 6 to 8 inches deep.
- Cover every addition with browns. Think of it as a lid made of leaves.
- Rodent-proof the base. Lay galvanized hardware cloth (1/4 or 1/2 inch mesh) under your bin.
- Use a closed bin or tumbler if you live near raccoons, bears or in a busy urban area.
- Keep a lidded kitchen caddy, and empty it every few days. It’s one of my favorite zero waste kitchen tips for keeping flies out of the house too.
By the way: A few insects are normal. Sowbugs, beetles and worms are part of a healthy pile. Clouds of fruit flies are the warning sign.
Mistake #9: Throwing In Big, Whole Pieces
Large, whole materials break down much more slowly than chopped ones, because microbes work on the surface. Smaller pieces mean more surface area and faster compost.
A whole pumpkin, a stack of cardboard, a pile of unshredded leaves.
They all go in whole. They all take forever.
How to fix it
- Chop kitchen scraps into roughly 1 to 2 inch pieces. (Rough chopping is fine. Don’t overthink it.)
- Mow over fallen leaves before adding them. It’s the easiest leaf shredder you already own.
- Tear cardboard into strips and remove tape and labels.
- Crush eggshells. Whole shells can stay recognizable for a very long time.
- Break up woody stems and small branches, or keep them out and use them as the airy base layer instead.
Quick comparison:
| Material | Whole | Shredded or chopped |
| Fallen leaves | Mats down, can take 1 to 2 years | Breaks down in months |
| Cardboard | Sheets block air and water | Strips add air and absorb moisture |
| Melon rinds | Weeks to months | Days to weeks |
Mistake #10: Using Compost Before It’s Finished
Unfinished compost can actually harm plants, because it can pull nitrogen from the soil as it keeps breaking down and may contain compounds that stunt seedlings. Finished compost is dark, crumbly and smells like forest soil.
Patience is hard.
You’ve been feeding this pile for months. You want to use it.
From my pile: I once mixed half-finished compost straight into a bed of lettuce seedlings. It still had recognizable bits of peel and a faint sour smell.
Within two weeks, the seedlings had turned pale yellow and stopped growing. The rotting material was pulling nitrogen out of the soil, right from under their roots.
Now I do the bag test every single time. It takes three days and has saved me a lot of lettuce.
Here’s the truth nobody tells you:
Finished compost smells like forest soil. If it smells sour or like ammonia, it isn’t done.
Once it’s truly finished, compost works beautifully alongside other organic fertilizers to feed your garden.
Signs your compost is ready
- Dark brown or black and crumbly
- Earthy, pleasant smell
- You can’t recognize the original materials (except maybe a few eggshells or twigs)
- The pile no longer heats up after you turn it
Two quick tests
- The bag test: Seal a handful of damp compost in a plastic bag for 3 days, then open it. A sour or ammonia smell means it needs more time.
- The seed test: Sow a few radish or cress seeds in a small pot of compost. If they sprout and grow normally within a week, you’re good.
How long does it take?
According to UNH Extension, compost can take anywhere from 6 months to 2 years depending on pile size, materials and how often you mix it. A well-managed hot pile can finish in a few months.
Not quite ready? Sift it and return the chunky bits to the pile, or use the rough compost as a mulch on top of the soil instead of mixing it into seed beds.
4 Composting “Rules” You Can Safely Ignore
Some advice gets repeated so often it starts to feel like law. These four aren’t worth stressing about.
1. “You must turn your pile every week.” Turning speeds things up and prevents smells. But a cold pile you never touch will still become compost. It just takes longer.
2. “You need a compost starter or activator.” You don’t. A shovel of finished compost or garden soil brings in all the microbes you need. Kitchen scraps and leaves already carry plenty.
3. “You need to add worms to an outdoor pile.” If your pile sits on bare soil, worms will find it on their own. Bought worms added to a hot pile may simply die from the heat.
4. “You need an expensive bin.” The pile does the work, not the container. A ring of chicken wire or a few pallets works as well as a $200 system.
Mistakes by Composting Method
Not everyone composts in a backyard heap. Each method has its own classic mistakes.
Compost tumblers
- Mistake: Adding only kitchen scraps, which turns the drum into a wet soup.
- Fix: Add browns with every load. Tumblers need more browns than open piles because they don’t drain.
- Mistake: Expecting heat from a half-full drum.
- Fix: Fill one chamber completely, then stop adding and let it finish while you fill the second.
Worm bins (vermicomposting)
- Mistake: Overfeeding. Uneaten food rots and smells.
- Fix: Feed only what the worms finish in a few days, and bury food under bedding.
- Mistake: Letting the bin overheat in summer sun or freeze in winter.
- Fix: Keep it somewhere that stays roughly between room temperature and a cool garage.
Bokashi
- Mistake: Treating bokashi as finished compost.
- Fix: Bokashi ferments food. It’s a pre-compost. Bury it in soil or add it to a compost pile, and wait a couple of weeks before planting in that spot.
Winter composting
- Mistake: Giving up when the pile freezes.
- Fix: Keep adding scraps. The pile will pause, then restart in spring. Insulate it with bags of leaves or straw around the sides if you want it to keep working longer.
Composting by the Numbers
Why do these mistakes matter beyond your garden? Because every pile that fails is one more family that goes back to sending scraps to the landfill.
The stats that matter
- 24%: Share of material sent to US landfills that is food waste (EPA)
- 58%: Share of fugitive methane from US municipal landfills that comes from food waste (EPA)
- 23 million tons: Surplus food sent to US landfills in 2024, releasing over 600,000 metric tons of methane (ReFED)
- 30:1: The ideal carbon-to-nitrogen ratio for a fast pile (UC Master Gardeners)
- 40% to 60%: The moisture sweet spot (NC State Extension)
- 3 x 3 x 3 feet: Minimum pile size to hold heat (Nebraska Extension)
Food rotting in a landfill has no oxygen, so it produces methane, a greenhouse gas far more potent than carbon dioxide.
Food breaking down in a healthy compost pile has oxygen.
That difference is the whole point.
And composting isn’t the only option. There are plenty of ways to reuse food waste before it ever reaches the bin.
From my pile: The first time I rebalanced a stalled pile properly (right size, 3 parts browns to 1 part greens, squeeze-test damp), I stuck a compost thermometer in the center every morning.
It sat at outdoor temperature for the first day. By day four, it was above 130°F.
That’s when I stopped thinking of composting as luck, and started thinking of it as a recipe.
Composting Doesn’t Need to Be Perfect, Just Balanced
Here’s the good news:
You don’t need perfect ratios or a fancy setup to make great compost.
Almost every problem in this guide comes back to four things: browns, greens, water and air. Fix those, and your pile will forgive a lot.
So here’s my challenge for you this week:
Pick one fix. Just one.
Maybe it’s keeping a bag of leaves next to your bin. Maybe it’s the squeeze test. Maybe it’s finally burying those scraps.
Small changes. Real results. Less waste in the landfill.
That’s how it starts.
And if composting is your first step, my guide on how to start a zero waste lifestyle shows you what to tackle next.