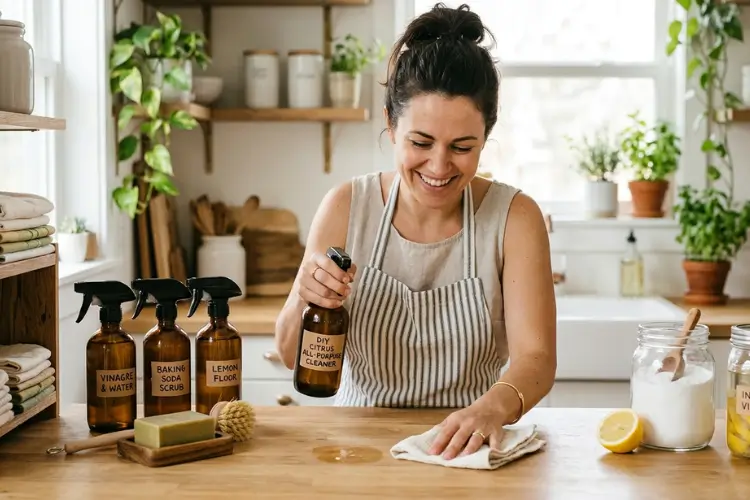
Zero waste cleaning means cleaning your home with reusable tools and refillable, low toxicity ingredients like vinegar, baking soda, and castile soap, instead of single use plastic bottles and disposable wipes. It’s one small piece of a broader zero waste lifestyle, just applied to your cleaning cabinet.
That’s it. That’s the whole idea.
I switched to zero waste cleaning three years ago, mostly because I got tired of a cabinet full of half empty spray bottles I couldn’t even name the ingredients in. Here’s what actually worked, tested in my own kitchen and bathroom, not copied off a Pinterest board.
Quick answers, if you’re in a hurry:
- Best all purpose swap: vinegar and water, 1:1 ratio
- Cheapest option: baking soda, under a dollar per pound
- Best for bathrooms and hard water stains: citric acid
- Most effective natural degreaser: castile soap
- Biggest mistake people make: mixing vinegar with bleach (never do this, more on why below)
What Zero Waste Cleaning Actually Means (And Why It’s Worth It)
Cleaning products aren’t as clean as their packaging suggests.
Many conventional cleaners contain volatile organic compounds, or VOCs, which the U.S. Environmental Protection Agency has linked to indoor air quality problems. Some also contain alkylphenol ethoxylates, chemicals known to disrupt aquatic life once they wash down the drain.
Here’s the truth nobody tells you:
Most of that ends up in waterways. A U.S. Geological Survey study found traces of detergent and disinfectant in a majority of streams tested across the country. That study is older now, but it’s a reminder that “flush it and forget it” was never really true.
The simple fix?
Swap a handful of disposable, chemical heavy products for a small set of reusable tools and pantry staple ingredients. You’ll use less plastic, breathe fewer fumes, and spend less money doing it. If this is your first step into the lifestyle, our guide on starting a zero waste lifestyle walks through the bigger picture beyond just cleaning.
Why This Actually Saves You Money and Waste
- A refillable spray bottle you use for years beats a “green” plastic bottle you throw away every few weeks
- Vinegar and baking soda cost a fraction of most name brand cleaners per use
- One reusable cloth can replace an entire roll of paper towels or a canister of wipes
What You Need Before You Start (Your Zero Waste Cleaning Kit)
You don’t need much. That’s kind of the point. This kit is really just a handful of zero waste swaps applied specifically to cleaning.
Reusable tools:
- Microfiber cloths (a few, for different surfaces)
- A loofah or natural fiber scrub sponge (yes, loofahs are compostable plants, not synthetic sponges)
- A refillable glass or durable plastic spray bottle
- An old toothbrush for grout and tight corners
Base ingredients:
- White vinegar
- Baking soda
- Castile soap (liquid)
- Citric acid
- Hydrogen peroxide
- Essential oils (optional, for scent)
By the way: You probably already own half of this. That’s why it’s such an easy switch.
15 Zero Waste Cleaning Hacks
Here’s every hack I actually use, in the order I reach for them most.
1. The All Purpose Vinegar Spray
Mix 1 cup white vinegar, 1 cup water, and 10 drops of essential oil in a spray bottle.
Use it on countertops, sinks, and glass. Skip it on natural stone like granite or marble. Vinegar’s acidity can etch the surface over time.
2. The Castile Soap Floor Cleaner
Mix 1 part liquid castile soap with about 24 parts water.
Works on floors, walls, and most sealed surfaces. It’s gentle enough for daily use and strong enough to cut through everyday grime. If you’ve got wood floors specifically, dilute it further and skip standing water, wood needs a lighter touch than tile.
3. The Microwave Steam Cleaner
Fill a bowl with water, add the juice of one to two lemons, and drop the lemon halves in too.
Microwave for three minutes, then let it sit for five more. Wipe away the loosened grime with a cloth. No scrubbing required.
4. The Baking Soda Soft Scrub
Sprinkle baking soda directly onto sinks, stovetops, or tile grout.
Scrub with a damp cloth or sponge. It’s a gentle abrasive, so it lifts stains without scratching most surfaces.
The next few hacks focus on the kitchen, since it tends to rack up the most disposable cleaning products. For even more ideas once you’re done here, check out our full list of zero waste kitchen tips.
5. The Flour Sink Polish
Wipe your stainless steel sink dry, then buff in about a quarter cup of flour with a dry cloth in small circles.
Sounds strange. Works surprisingly well for a streak free shine.
6. The Garbage Disposal Freshener
Freeze white vinegar in an ice cube tray, then run the cubes through your disposal.
The vinegar cleans the blades and neutralizes odors in one step.
7. The Lemon Cutting Board Scrub
Cut a lemon in half and rub it directly across your cutting board.
The acidity lifts stains and cuts through lingering food odors, especially garlic and onion smell.
8. The Vinegar and Baking Soda Drain Refresher
Pour half a cup of baking soda down the drain, followed by half a cup of vinegar.
Let it fizz for ten minutes, then flush with hot water. Do this once a month to keep drains fresh.
Caution: don’t do this right before or after using a chemical drain cleaner. Let one method fully clear first.
These next three tackle the bathroom, where hard water and grime build up fastest. If you want to go further, our guide to zero waste bathroom swaps covers everything beyond just cleaning products.
9. The Citric Acid Kettle Descaler
Add 100 to 150 grams of citric acid to an empty kettle, then fill with about 1.5 liters of boiled water.
Let it sit, then run the kettle once through. You’ll watch the limescale fizz away.
10. The Toilet Bowl Fizz Bomb
Combine baking soda, citric acid, and a few drops of essential oil, then press into small molds and let dry overnight.
Drop one in the bowl, let it fizz, and scrub lightly with a brush. No plastic bottle, no bleach fumes.
11. The Hydrogen Peroxide Bathroom Disinfectant
Fill a spray bottle with 3% hydrogen peroxide (the standard drugstore strength, used undiluted).
Use it on toilets, sinks, and light switches for a genuine disinfecting step, not just a surface clean. Cleaning and disinfecting are actually two different jobs. Clean first with soap to remove dirt and germs, then disinfect after.
12. The DIY Reusable Wipes
Cut up old t shirts or towels into small squares, then soak them in a mix of water, a splash of vinegar, and a few drops of essential oil.
Store them in a reusable container. Wash and reuse instead of tossing.
13. The Boiling Water Fabric Refresh
Fill a large pot with water and bring it to a boil, then add your usual eco friendly laundry detergent or a sprinkle of baking soda.
Wrap the lid in a microfiber towel and hold soft furnishings or stained fabric over the steam. A low waste stand in for a steam cleaner.
14. The Old Glove Blind Duster
Wear an old cotton or wool glove and run your fingers along horizontal blind slats.
It gets into the grooves a cloth never reaches, and it uses zero disposable dusting wipes.
15. The Loofah Multi Sponge Hack
Cut one whole loofah into three pieces.
You’ll get three scrubby sponges for less than the cost of one synthetic version, and every piece is fully compostable when it wears out.
Zero Waste vs. Store Bought Cleaners: Cost and Impact Comparison
So how does this actually stack up against what’s already under your sink?
| Cleaner Type | Cost Per Use | Plastic Avoided | Prep Effort |
| DIY vinegar all purpose spray | Roughly a few cents | One less bottle every 1 to 2 months | Under 2 minutes to mix |
| DIY castile soap floor cleaner | Roughly a few cents | One less jug every few months | Under 2 minutes to mix |
| Store bought all purpose spray | Several dollars per bottle | None, unless refill program exists | None, ready to use |
| Store bought disinfecting wipes | Ongoing cost per canister | None, canister is often not recyclable | None, ready to use |
The pattern is clear. DIY costs pennies per use once you own the base ingredients. Store bought convenience comes at a real dollar cost and a real plastic cost, refill after refill.
Common Mistakes to Avoid With DIY Cleaners
This is the part most guides skip. It matters.
- Never mix vinegar and bleach. Together they create toxic chlorine gas. This isn’t a minor caution, it’s a real safety issue, so keep these two ingredients in entirely separate corners of your cleaning cabinet.
- Don’t combine castile soap and vinegar. The acid in vinegar curdles castile soap into a gross, chunky residue. Use them for different jobs, never in the same bottle.
- If you want to go deeper on the vinegar and baking soda combo specifically, since it shows up in more than one hack above, we’ve covered it in detail in cleaning with vinegar and baking soda.
- Skip vinegar on natural stone. Granite, marble, and other stone surfaces can etch and dull from the acidity over repeated use.
- Watch essential oils on glass and chrome. They can leave a faint streaky film. If you want a truly streak free shine, leave the oil out of glass cleaner recipes.
- Don’t assume “natural” means “instant.” DIY cleaners often need a minute or two of dwell time to actually work. Spray, wait, then wipe.
How Much Waste and Money You’ll Actually Save
Here’s what switching really adds up to.
- Fewer bottles: replacing even two or three disposable cleaners a month with refillable DIY versions keeps dozens of plastic bottles out of landfills every year
- Lower cost per use: vinegar, baking soda, and castile soap all cost a fraction of their bottled, branded counterparts per application
- Less chemical exposure: fewer VOCs in your air, fewer harsh chemicals down your drain and into local waterways
None of this requires you to do everything on this list at once.
Because: Even swapping one or two products is a real reduction. Zero waste isn’t about perfection. It’s about buying different, not just buying less.
You Don’t Need a Cabinet Full of Plastic Bottles
You don’t need a cabinet full of plastic bottles to have a genuinely clean home. A handful of pantry staples, a few reusable tools, and the fifteen hacks above will get you there, safely and cheaply. Start with just one or two swaps this week. See how it feels.
Then keep going.