Quick answer: Dust or vacuum wood floors first. Then mop with a barely damp microfiber mop and a pH-neutral wood cleaner. Never use a wet mop or steam. For furniture, dust with the grain. Wipe with a cloth dampened in mild soap and water. Dry it right away. Always spot-test any cleaner first. And before you start, figure out if your wood’s finish is sealed, oiled, or waxed. That one detail decides almost everything else.
Wood looks fine for years of casual dusting. Then one wrong cleaner, or one puddle left too long, leaves a cloudy patch or a white ring. No amount of buffing fixes it. Most of that damage isn’t neglect. It’s cleaning wood the way you’d clean tile, with too much water, or the wrong product for the finish underneath.
This guide covers both wood floors and wood furniture. What to do, what to skip, and how to fix the marks that show up even when you’re careful.
If you’ve ever wondered just how long wood can last when it’s cared for properly, some of the world’s oldest living trees are thousands of years old. The wood in your home deserves a little of that same care.
Before You Start: Identify Your Wood’s Finish
This step gets skipped the most. It also matters the most. Wood finishes fall into three categories. Each one handles moisture differently.
Wood is also one of the most durable sustainable building materials you can have in a home, but only if it’s cared for the right way. Cleaning it properly is part of getting the most life out of it.
The 3-Second Finish Test
Run your fingers across the surface. Look at how it responds.
- Sealed (polyurethane, lacquer, varnish): Feels smooth, almost plastic-like. Often has visible sheen. Water beads on top instead of soaking in. This is the most common finish on modern floors and store-bought furniture.
- Oiled (tung oil, linseed oil, Danish oil): Feels more like natural wood. Matte. Slightly warm. Grain is visible and tactile. Water tends to darken the surface a little instead of beading.
- Waxed: Smooth, but softer than a sealed finish. A fingernail can sometimes leave a faint mark. Common on older or antique furniture.
Not sure which one you have? Test it in a hidden spot. Try the underside of a table, or a closet corner of a floor. Dab a little water. Watch it for 30 seconds. Beading means sealed. Darkening or absorption means oiled or waxed.
Why the Finish Type Changes Everything You Do Next
A sealed finish works like a raincoat. The topcoat protects the wood underneath. That’s why it can handle a lightly damp cloth without much risk.
An oiled or waxed finish is different. It has soaked into the wood itself. There’s no protective barrier on top. Water and generic cleaners can lift or streak it directly.
This is where most damage happens. People use a sealed-finish method on oiled wood. Or they put a heavy oil-based polish on a sealed finish. Either way, they were only trying to clean, and ended up damaging the piece instead.
What You’ll Need
Nothing fancy here, just a few basics you probably already have.
Supplies for Wood Floors
- Soft-bristle broom or dust mop
- Vacuum with a hard-floor setting (brush roll off)
- Microfiber mop, damp, not wet
- pH-neutral wood floor cleaner
- Two clean, dry microfiber towels
Supplies for Wood Furniture
- Soft microfiber dusting cloth
- Vacuum with a soft brush attachment (for carved details and crevices)
- Mild dish soap
- A small bucket or bowl of warm water
- Soft sponge or cloth
- A separate dry cloth for immediate drying
- Furniture polish or wax matched to your finish type (optional, occasional use only)
Notice how short this list is. Most of it is probably already in your kitchen. If you like this kind of simple, low-waste approach to home care, our guide to zero waste swaps has more ways to cut down on single-use cleaning products.
How to Clean Wood Floors, Step by Step
Four simple steps, done in order, is all it takes.
Step 1: Remove Dust and Debris
Sweep or vacuum first. Always. Do this before any liquid touches the floor.
Here’s why it matters: dust and grit act like sandpaper under a mop. Mopping over debris grinds fine scratches straight into the finish. If you’re vacuuming, use the hard-floor setting. Turn the brush roll off. A spinning brush roll can scuff wood the same way loose grit does.
Step 2: Choose the Right Mop Method for Your Finish
Sealed finish? A microfiber mop, lightly dampened with water or a diluted pH-neutral cleaner, works well.
Oiled or waxed finish? Skip liquid mopping. Stick to dry methods, like a microfiber dust mop or vacuum, unless a product is specifically labeled safe for that finish.
Step 3: Mop Without Over-Wetting
Wring the mop until it’s damp to the touch. Not dripping.
Standing water is the single biggest cause of long-term wood floor damage. It seeps into the seams between boards. That causes swelling, warping, or a cloudy discoloration that won’t wipe away. Work in small sections. Never let water pool anywhere.
Step 4: Dry and Buff
Go over the floor with a dry microfiber towel right after mopping. This matters even more in humid weather, when floors take longer to air-dry. It’s a quick step, and it brings back shine without a separate polish.
How Often to Clean Wood Floors
Dust or dry-mop daily to weekly, depending on foot traffic. Vacuum weekly. Wet-mop with a proper wood floor cleaner about once a month.
High-traffic entryways and kitchens may need it more often. Low-traffic rooms need it less. One caution: over-mopping with liquid, even done correctly, adds up over time. It can dull a finish faster than under-cleaning would.
How to Clean Wood Furniture, Step by Step
Five easy steps, gentler than you’d think.
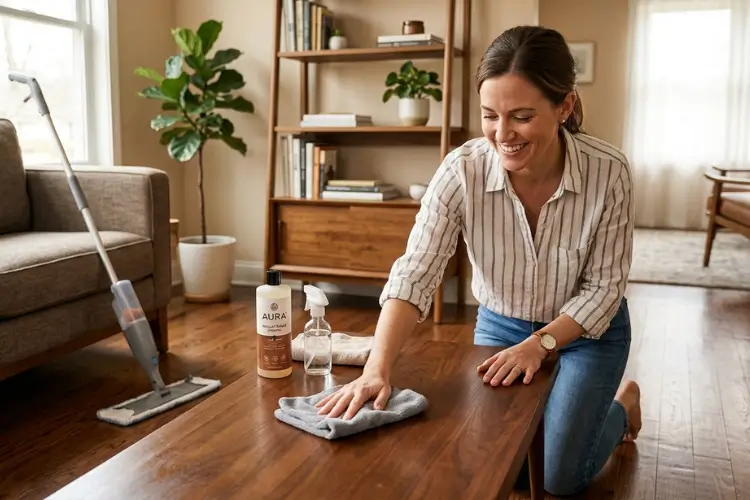
Step 1: Dust With the Grain
Use a soft, dry microfiber cloth. Wipe in the direction of the wood grain, not across it.
Dusting against the grain pushes small particles into the finish instead of lifting them off. Over time, that’s what causes fine surface scratches.
Step 2: Spot-Test Your Cleaner
Before cleaning the whole piece, test it. Dab a small amount of your solution on a hidden spot, like the underside of a chair or the back of a drawer. Wait a few minutes.
Finish looks unchanged? You’re clear to clean the rest of the piece.
Step 3: Clean With a Mild Soap Solution
Mix a few drops of mild dish soap into warm water. Dip a soft cloth or sponge in the solution. Wring it out well. It should feel barely damp, not wet. Wipe gently, following the grain.
This simple combination handles most everyday dust, light grease, and grime. And it does it without putting the finish at risk.
Step 4: Dry Immediately
Right after cleaning, go over the whole surface with a separate dry cloth. This is the step people skip most. It’s also the one that causes the most avoidable damage. Wood left damp, even briefly, can start to swell, cloud, or warp.
Step 5: Polish or Wax (Only If Needed)
You don’t need polish or wax every time you clean. In fact, using it too often works against you. It builds up in layers. That buildup attracts more dust, and eventually creates the cloudy film people mistake for dirt.
Apply it sparingly, a few times a year at most. And match the product to your finish type. An oil-based polish on a waxed finish, for example, can react badly and leave a hazy residue.
What NOT to Use on Wood
| Product | Safe on Wood? | Why |
| pH-neutral wood cleaner | ✅ Yes | Formulated specifically not to strip or dull the finish |
| Mild dish soap + water, well wrung | ✅ Yes, sparingly | Low residue and low moisture when applied correctly |
| White vinegar | ⚠️ Occasional use only | Mildly acidic; repeated use can dull the finish over time |
| Steam mop or steam cleaner | ❌ No, on most finishes | Heat and moisture can cloud, warp, or damage the finish |
| Bleach | ❌ No | Strips finish and can discolor the wood underneath |
| Heavy oil or wax spray, used daily | ❌ No, as a routine cleaner | Builds up residue, attracts dust, causes cloudiness over time |
| Abrasive pads or melamine sponges | ❌ No | Physically scratches and dulls the finish |
How to Remove Common Wood Stains and Damage
Most of these fixes use stuff you already have at home.
Water Rings and Heat Marks
A white ring usually means moisture got trapped just under the surface of the finish. Not in the wood itself.
Try this: rub non-gel toothpaste gently in a circular motion with a soft cloth. Many rings lift within a few minutes. For a heat mark, hold a hair dryer a few inches away on low heat. This can coax trapped moisture back out through the finish. Test on a hidden spot first. Buff with a clean, dry cloth afterward.
Sticky Residue and Old Polish Buildup
That dark, tacky film on old furniture? It’s usually built-up wax and oil, not dirt.
A cloth lightly dampened with mineral spirits, used in a well-ventilated room, typically cuts through it. Wipe with the grain. Follow immediately with a dry cloth. One tip: don’t combine this with a soap-and-water clean on the same day. Let the surface fully dry between methods.
This same do-it-yourself mindset works well elsewhere in the house too. Our DIY washing machine cleaner recipe uses the same kind of simple, pantry-staple ingredients.
Scratches and Scuffs
Light scuffs on floors often buff out with a clean tennis ball or a soft cloth, rubbed briskly over the mark.
Deeper scratches on furniture are a bit trickier. A matching wood touch-up marker can help. So can a small amount of walnut meat, rubbed into the scratch. The natural oils darken and fill fine lines. But if a scratch is gouged through the finish into bare wood, that’s not a cleaning fix. Call a professional or use a proper repair kit.
Grease and Kitchen Grime
Kitchen tables and cabinets need a bit more firepower. A diluted vinegar-and-water solution cuts through grease better than soap alone. Use it sparingly, though. Repeated use can dull a finish over time. For regular daily wipe-downs, plain mild soap and water is the safer habit.
How to Protect Wood Floors and Furniture Long-Term
Caring for what you already own, instead of replacing it, is one of the simplest ways to live more sustainably. It’s a core idea behind a zero waste lifestyle, and it applies just as much to your floors and furniture as anything else in your home.
- Use entrance mats at every exterior door. They catch grit before it reaches the wood.
- Add felt pads under every furniture leg. Replace them yearly. They trap grit that can scratch floors as furniture shifts.
- Manage indoor humidity. Keep it roughly between 35% and 55%. Wood expands when it’s humid and contracts when it’s dry. Swings in either direction cause gaps, buckling, or cracking over time.
- Adopt a no-shoes policy indoors. Heels and cleats concentrate a lot of pressure into a tiny surface area. Even a well-finished floor can dent.
- Use rugs in high-traffic paths. They reduce wear where people and pets walk most.
- Wipe up spills immediately. Do this even on a sealed finish.
A Little Care Goes a Long Way
Cleaning wood isn’t complicated. It just asks for a little more care than tile or laminate.
Know your finish first. Keep everything barely damp, never wet. Dry it right away. That’s really the whole system, for both floors and furniture.
The stains and marks that show up along the way? Almost all of them have a gentle fix. You rarely need anything harsher than what’s already in your kitchen.
Treat your wood well, and it’ll last for decades, not years. That’s the real payoff here. A little bit of the right care, instead of a lot of the wrong kind.