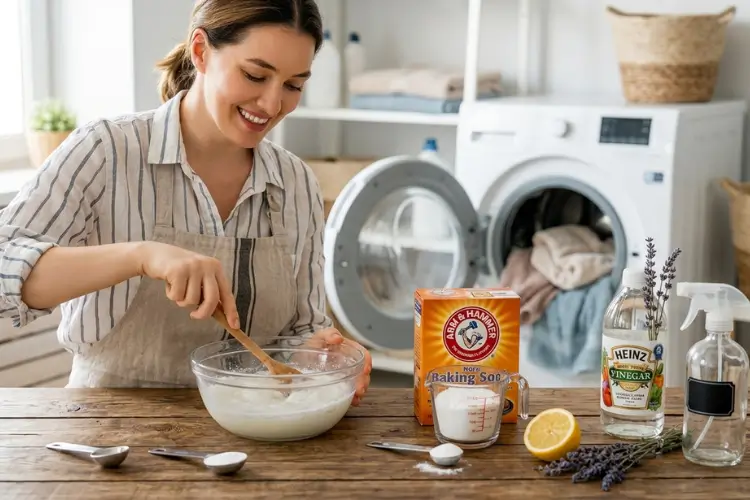
The easiest DIY washing machine cleaner is a two-cycle wash. Run one empty hot cycle with ½ cup of baking soda. Then run a second empty hot cycle with 2 cups of white vinegar in the detergent dispenser.
This combo breaks down soap scum, mineral buildup, and mold-causing residue. No commercial cleaner needed. Used correctly, vinegar is safe for front-load and top-load machines. Just dilute it, and don’t let it soak directly against rubber seals for long periods.
Quick summary
- Deep clean: ½ cup baking soda (cycle 1) → 2 cups white vinegar (cycle 2). Both empty hot cycles.
- Weekly maintenance: ¾ cup vinegar + 10 drops tea tree or grapefruit oil in a spray bottle. Wipe the gasket and drum.
- Frequency: Every 30 wash cycles. Roughly monthly for most households.
- Safety note: Dilute vinegar before it touches rubber seals for long periods. Never mix vinegar and bleach.
A washing machine doesn’t clean itself. Every load leaves behind trace detergent and fabric softener. If you have hard water, mineral deposits too.
Over time, that residue builds into a film. The film traps moisture. Trapped moisture turns into mold. Mold is that musty smell you notice when you open the door.
This guide covers exactly how to make and use a DIY washing machine cleaner. It covers front-loaders versus top-loaders. And it resolves the one question most guides get wrong: is vinegar actually safe?
It’s also one of the easiest zero waste swaps you can make. No plastic tablet packaging, no single-use pods, just two pantry staples you probably already own.
What You’ll Need
You don’t need anything exotic. A standard grocery store has it all.
Core ingredients:
- White distilled vinegar (not apple cider or scented cleaning vinegar)
- Baking soda (sodium bicarbonate)
- Essential oil (tea tree or grapefruit work well). Optional, just for scent.
- Water, for dilution
Tools:
- An 8-ounce spray bottle
- A microfiber cloth
- An old toothbrush, for gasket folds and dispenser corners
- A non-scratch sponge
That’s it. No borax, no bleach, no commercial tablet needed for the base method. We’ll cover where those fit in later.
Is Vinegar Safe for Your Washing Machine? (The Controversy, Resolved)
Most DIY guides skip this question. Or they answer it with a flat “yes.” You should actually pay attention before you start.
What manufacturers say
Maytag’s official guidance is direct: don’t pour vinegar into the drum. Their reasoning is real: vinegar’s acidity can damage rubber seals and hoses over time. They recommend a purpose-made cleaner like Affresh instead.
This isn’t a fringe opinion. It reflects a genuine material-science concern. Vinegar’s acetic acid is mild, but it’s still corrosive to rubber, specifically EPDM rubber, the type most washer gaskets are made from. Repeated, undiluted, prolonged contact is the risk.
What cleaning experts recommend
At the same time, professional cleaners recommend vinegar constantly. That includes for the drum, gasket, and dispenser. Their condition: dilute it, and don’t overuse it.
Vinegar’s acidity dissolves mineral deposits and soap scum well. Baking soda’s mild alkalinity neutralizes odors. Together, they scrub gently without scratching the drum.
The safe middle ground
These two positions aren’t actually in conflict. The difference is concentration and frequency. Here’s how to get the benefit without the risk:
- Dilute it. Mix equal parts white vinegar and water. Don’t pour it full-strength directly onto rubber parts.
- Limit frequency. Save a vinegar deep-clean for once every 30 wash cycles. That’s roughly monthly for an average household.
- Don’t let it sit indefinitely. A short soak, up to an hour during a paused cycle, is fine. Days of standing vinegar against a gasket is not.
- Wipe seals dry afterward. This limits contact time. It also stops the moisture that causes mold in the first place.
Never mix vinegar and baking soda in the same compartment at the same time. They neutralize each other on contact. That cancels out the cleaning power of both. Use them in separate cycles instead. And never mix vinegar with bleach. Together they produce chlorine gas, which is dangerous to breathe.
If your washer is under warranty, or you’re simply risk-averse, a commercial tablet is the zero-compromise option. See the comparison table below. If diluted, occasional vinegar use sounds fine to you, it’s a genuinely effective, low-cost alternative.
The 2-Cycle DIY Deep-Clean Method
This is the core method. Two empty hot cycles, one with baking soda, one with vinegar.
- Add baking soda: Start with an empty, dry machine. Add ½ to 1 cup of baking soda directly into the drum.
- Run a hot cycle: Set your washer to its hottest, longest cycle. Use “Clean Washer” or “Tub Clean” if your machine has it. Run it to completion. This scrubs the drum and loosens old residue.
- Add vinegar: Once cycle one finishes, pour 2 cups of white vinegar into the detergent dispenser. Not directly onto the drum or gasket. Add 8–10 drops of essential oil here if you want a scent boost.
- Run a second hot cycle: Run another full cycle on the hottest, largest setting. If your machine allows pausing, let the vinegar sit for 20–30 minutes partway through for a deeper soak.
- Wipe down the drum, gasket, and dispenser: Once finished, use a microfiber cloth on the drum interior, the rubber gasket, and the dispenser tray. This removes loosened residue before it redeposits.
- Leave the door open: Let everything air-dry before your next load. This one habit prevents more mold than any product does.
DIY Recipes by Machine Type
Front-loaders and top-loaders build up grime differently, so the recipe changes slightly for each.
Front-Loading Washer Cleaner Recipe
Front-loaders are more prone to mold. The rubber door gasket stays damp between cycles. That’s a warm, dark, moist environment: exactly what mold needs.
Follow the 2-cycle method above. Then give the gasket extra attention. Pull back each fold of the rubber seal. Wipe with a vinegar-dampened cloth. Check for green, brown, or black residue as you go.
Top-Loading Washer Cleaner Recipe
Top-loaders rarely get gasket mold. Instead, buildup collects around the agitator and tub rim.
Use 4 cups of vinegar instead of 2. The tub holds more volume. Let the cycle pause mid-agitation for a 30–60 minute soak before it finishes.
HE (High-Efficiency) Washer Considerations
HE washers use less water per cycle. That means less rinsing, so residue is more of a concern.
Make sure you’re using HE-labeled detergent, in the correct amount. Wrong detergent, or too much of it, is one of the most common causes of buildup in the first place.
The 2-cycle method works the same way on HE machines. Just stay consistent with the monthly schedule.
Weekly Wipe-Down Recipe
The deep clean above is a monthly job. Between deep cleans, a quick weekly wipe-down stops buildup before it starts.
Recipe: Combine ¾ cup white vinegar with 10 drops tea tree oil and 5 drops grapefruit oil in an 8-ounce spray bottle. Shake well.
Use: After your last load of the week, spray the door seal, drum interior, and detergent dispenser. Wipe with a soft cloth. Remove the dispenser tray, spray and wipe it separately, then let everything air dry.
How to Clean the Rubber Gasket & Door Seal
The gasket is the most common source of “moldy” smell in front-loaders. It deserves its own step, not an afterthought.
- Pull back each fold of the rubber seal. Mold hides in the creases, not the visible surface.
- Spray diluted vinegar (equal parts vinegar and water). Let it sit for 2–5 minutes.
- Scrub gently with an old toothbrush on any visible mold or grime in the folds.
- Wipe completely dry with a clean cloth.
- Prop the door open afterward. No moisture should stay trapped against the rubber.
Do this weekly, even just the wipe-dry step, and most gasket mold never gets the chance to start.
How Often Should You Clean Your Washing Machine?
“Once a month” is a reasonable default. But your ideal frequency depends on how much laundry you run and what detergent you use.
| Household Usage | Recommended Cleaning Frequency |
| Light (1–2 loads/week) | Every 6–8 weeks |
| Average (3–5 loads/week) | Every 30 wash cycles (~monthly) |
| Heavy (6+ loads/week, or large/dirty loads) | Every 2–3 weeks |
| Plant-based/HE detergent users | Every 6–8 weeks (these tend to rinse cleaner) |
| Hard water households | Every 3 weeks, due to faster mineral buildup |
Regardless of frequency, two habits matter every time: wipe down weekly, and leave the door open after every load. Those two habits prevent more buildup than any deep-clean schedule.
DIY Washing Machine Cleaner vs. Store-Bought Tablets
Both approaches work. Here’s how they compare, so you can choose based on your priorities, not marketing.
| Method | Cost per Use | Effectiveness on Mold/Odor | Seal Safety | Time Required |
| DIY (vinegar + baking soda) | ~$0.30–$0.50 | High, especially for odor and mineral buildup | Safe if diluted and used monthly. Risk rises with frequent, undiluted use | ~2 hours (two full cycles) |
| Commercial tablets (Affresh, Tide) | ~$1–$2 | High, formulated for washer residue specifically | Manufacturer-approved for all washer types, including HE | ~1 hour (single cycle) |
| Hydrogen peroxide | ~$0.20 | Moderate to high, strong on stains and disinfecting | Safe on plastic, enamel, and stainless steel. Won’t discolor | ~1 hour (single cycle) |
Want the lowest cost, and don’t mind two cycles? DIY wins. Want a manufacturer-endorsed option with zero guesswork, especially under warranty? A commercial tablet removes the dilution and frequency variables entirely.
Troubleshooting: My Washing Machine Still Smells
Ran the deep-clean and the smell’s still there? The source usually isn’t the drum or gasket. Check these next.
Check the Filter
Most front-loaders have a small debris filter near the bottom front. It’s behind a small access panel. Lint, hair, coins, and small debris collect here. They hold onto odor long after the drum itself is clean. Remove it, rinse under running water, and reinstall.
Check the Drain Hose
A partially clogged or kinked drain hose traps standing water. That water develops its own odor, separate from anything in the drum. Check for kinks or buildup at the connection points if your hose is visible.
When to Call a Repair Tech
Cleaned the drum, gasket, filter, and drain hose, and it still smells? That points to something deeper. A failing door seal. A drainage problem you can’t reach. Biofilm buildup inside the system. At that point, a repair technician can diagnose it faster, and more safely, than continued DIY troubleshooting.
Key Takeaways
- A two-cycle wash with baking soda and vinegar is the most effective DIY washing machine cleaner. It dissolves mineral buildup and neutralizes odor without commercial products.
- Vinegar is safe when diluted and used about once a month. The manufacturer warnings and the DIY recommendations aren’t really in conflict. It comes down to concentration and frequency.
- Front-loaders need extra attention on the gasket. Top-loaders need a larger vinegar volume for the bigger tub.
- Smell persists after cleaning? Check the filter and drain hose before assuming the machine needs repair.
- Leaving the door open after every load prevents more buildup than any single cleaning method.
Always check your washing machine’s manual before cleaning. Recommendations vary by brand and model, and some warranties specify approved cleaning methods.
A Clean Washing Machine Really Is This Simple
A clean washing machine isn’t complicated. Two ingredients, two cycles, and a few minutes of wiping down the gasket each week. That’s really all it takes.
The vinegar question trips a lot of people up. But now you know the real answer: diluted and occasional is safe, undiluted and constant is not. That one distinction is the difference between a clean machine and a damaged one.
Start with the 2-cycle deep clean this week. Add the weekly wipe-down after that, and you’ll likely never deal with that musty smell again.
Looking for more ways to cut waste at home? Our zero waste beginner guide has more simple swaps like this one.