A plastic-free lunch is a packed meal that swaps single-use plastic bags, wrap, and containers for reusable alternatives: stainless steel, glass, silicone, and beeswax cloth.
That’s the short version. Here’s the long version: six swaps, a step-by-step plan for school lunches, a step-by-step plan for work lunches, and the real numbers on cost and waste.
Quick start, if you’re short on time:
- Swap the sandwich bag for a beeswax wrap or a reusable pouch
- Swap the lunch box for stainless steel or glass
- Swap the water bottle for insulated steel
- Swap plastic wrap for a lid, a cloth, or a second container
- Swap plastic utensils for a travel set
- Swap condiment packets for small leakproof cups
Keep reading for the how, the why, and the exact gear that makes it stick.
What Does a Plastic-Free Lunch Actually Mean?
Let’s clear something up first.
“Plastic-free” and “zero-waste” get used like they’re the same thing. They’re not.
A plastic-free lunch just means no single-use plastic touches the food or the packaging. A zero-waste lunch goes further: no waste at all, including paper napkins and compostable pouches.
You don’t need to chase a full zero waste lifestyle to get 90% of the benefit. Plastic-free is the goal that actually sticks.
So where do you start? With why it matters. Because if you don’t believe it’s worth doing, you won’t do it for long.
Why Ditching Plastic in Your Lunch Actually Matters
Here’s the truth nobody tells you: your lunch container might be shedding plastic into your food right now, especially if it ever sees a microwave.
The numbers:
- Researchers at the University of Nebraska-Lincoln found that microwaving common plastic food containers (they tested baby food containers and a reusable pouch) released far more microplastic and nanoplastic particles than refrigeration or room-temperature storage did. In some cases it was more than 2 billion nanoplastic particles per square centimeter. [1][2]
- The EPA’s most recent published figures (2018) show only about 10% of plastic bags, sacks, and wraps were recycled in the U.S. More than 3 million tons were landfilled that year. [3]
- Thin plastic films like sandwich bags can jam sorting equipment at recycling facilities, so many curbside programs won’t take them. Check your local rules, but don’t count on recycling them. [4]
- Eartheasy cites a Green Child Magazine estimate of almost $400 per student, per year, in savings from going no-waste. [5]
Read that last one again. This isn’t just an environmental play. It’s a household-budget play too.
Why the microwave part matters specifically: heat is the trigger. Plastic that’s fine sitting in the fridge can behave very differently once it hits a microwave or a dishwasher’s hot cycle. That’s the mechanism, and it’s why “just use any plastic container” isn’t quite the same advice as “use one designed to be heated.”
By the way: none of this requires perfection. Small zero waste swaps, done consistently, beat a total overhaul you abandon in three weeks.
The 6 Plastic Swaps That Do 90% of the Work
You don’t need to buy everything at once. Start with one swap, get it into your routine, then add the next.
1. Swap the sandwich bag
Beeswax wrap or a reusable cloth pouch is one of the easiest eco friendly alternatives to plastic bags, minus the landfill trip. Beeswax wrap molds around a sandwich with the warmth of your hands, and it rinses clean with cool water and mild soap.
The simple fix? Keep two or three in rotation so one is always clean.
2. Swap the lunch box
Stainless steel and glass are the two materials worth trusting long-term. Steel is lighter and nearly indestructible. Glass shows you exactly what’s inside, but it’s heavier and needs a bit more care in a backpack.
Bento-style boxes with built-in compartments solve the “everything touching everything” problem without a single extra container.
3. Swap the water bottle
An insulated steel bottle replaces the juice pouch and the disposable water bottle in one move. It also keeps water cold for hours, which a plastic bottle never quite manages.
4. Swap plastic wrap
Instead of cling film, use a snap-on lid, a cloth cover, or just a second small container. Cling wrap can’t be recycled in most programs, and it’s one of the easiest swaps to make because you probably already own something that works instead.
5. Swap plastic utensils
A cheap set of steel utensils in a slim case handles this permanently. Check a thrift store first. You genuinely don’t need to buy new here.
6. Swap condiment packets
Ranch cups, hummus cups, and dressing packets are small, but they add up fast over a school year or a work week. A few tiny leakproof containers replace all of them, and they pay for themselves within a couple of months if you’re a daily condiment person.
That’s the whole system. Now let’s put it into practice, because school lunches and work lunches run into different problems.
How to Pack a Plastic-Free School Lunch, Step by Step
When I first tried this for my kid’s lunch, I assumed it would take longer every morning. It didn’t. It took longer for exactly one week, while I figured out where everything lived.
Here’s what actually works:
- Pick one bento-style steel or glass box with built-in compartments, so wet and dry food never need a separate container.
- Pack the sandwich in beeswax wrap or a cloth pouch, folded to fit the largest compartment.
- Use small leakproof cups for dips and condiments instead of single-serve packets.
- Send hot food in an insulated thermos, not a cafeteria microwave you’re hoping is free.
- Add a cloth napkin instead of paper, and toss it in with the regular laundry.
- Label everything. Every container, every utensil case, every water bottle. This is the single biggest reason reusable gear comes home instead of staying in a lost-and-found bin.
A sample no-plastic school lunch: half a sandwich in beeswax wrap, apple slices treated with a bit of lemon juice so they don’t brown, a small cup of hummus, pretzels in their own compartment, and water in a steel bottle. Nothing in that lunch touches a single piece of plastic, and nothing in it needs to come home dirty enough to scare anyone off doing it again tomorrow.
What about hot lunches?
Heat it at home, transfer it straight into a thermos funtainer, and it stays warm past lunchtime. Soup, pasta, and grilled cheese all travel fine this way. Crispy foods lose a little crunch. That’s a real tradeoff, not a myth, and it’s worth knowing upfront so it doesn’t feel like failure when it happens.
Doesn’t the kid lose all this stuff
Less than you’d think, once it’s labeled. Kids who’ve only ever known the plastic-free version treat it as normal, not as a chore, and normal routines are the ones that survive a school year.
How to Pack a Plastic-Free Lunch for Work, Step by Step
This is the part almost every other guide skips. School lunches get all the attention. Adults eating at a desk get an afterthought.
But: the constraints are actually different. You might not have a fridge. You might not have a microwave. You’re probably not labeling anything, because nobody’s stealing your lunch (usually).
Here’s the plan:
- Choose one multi-compartment steel container that can handle a full meal, not just snacks. This does double duty as your meal-prep container too.
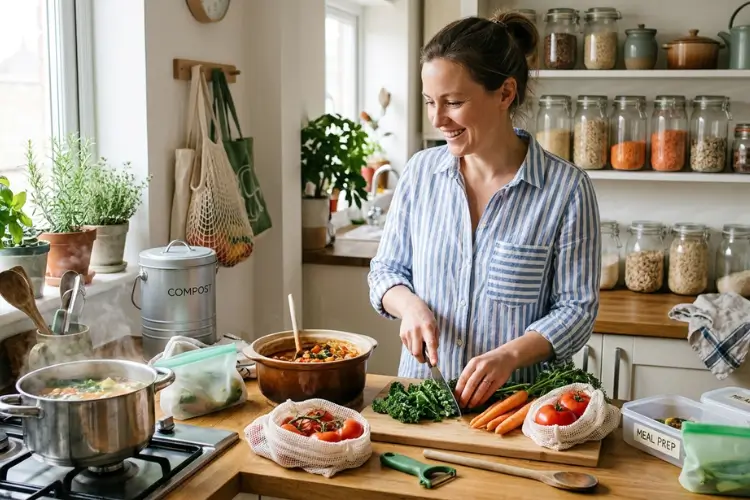
- Batch-prep on one day with a few Zero Waste kitchen tips, straight into your reusable containers, so you’re never reaching for a disposable one mid-week.
- Pack dressing and sauces separately in a small leakproof cup so your greens don’t turn to soup by noon.
- Bring an insulated canister for hot food if there’s no microwave, or a cold-safe container if there’s no fridge. Either way, you’re not depending on office infrastructure you don’t control.
- Keep a travel utensil set at your desk permanently. One set, left there, removes the daily “did I forget my fork” problem entirely.
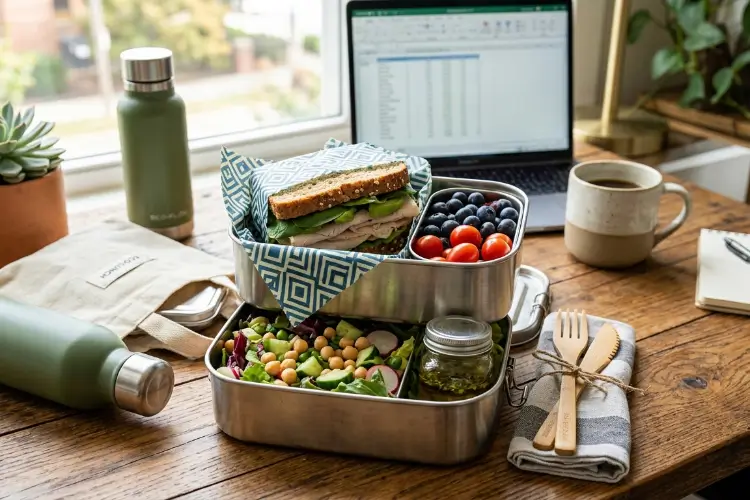
A sample no-plastic desk lunch: leftover grain bowl packed straight into a steel container the night before, dressing on the side in its own small cup, a piece of fruit, and your usual coffee in a mug you already own. Nothing here required a special trip to buy anything you don’t already have.
What if there’s genuinely no fridge or microwave?
This is where an insulated container earns its cost. Soup, chili, and grain bowls all hold their temperature for hours in a good thermal container, no plug required. Salads and sandwiches don’t need temperature control at all, so they’re actually the easiest thing to bring into a no-fridge office.
Plastic-Free Lunch Gear Comparison
Here’s the honest breakdown of what to actually buy.
| Item | Material | Approx. Cost | Best For | Dishwasher-Safe |
| Bento lunch box | Stainless steel | $20-$40 | School lunches, durability | Usually yes |
| Lunch box | Glass with lid | $15-$30 | Seeing contents, reheating | Yes |
| Sandwich wrap | Beeswax cotton | $12-$18 (set of 3) | Sandwiches, quick wraps | No, hand wash |
| Water bottle | Insulated steel | $20-$35 | Cold drinks all day | Usually yes |
| Condiment cups | Steel or silicone lid | $10-$15 (set) | Dips, dressings, sauces | Yes |
| Utensil set | Steel with travel case | $8-$15 | One-time permanent fix | Yes |
Notice what’s not on this list: anything you need to rebuy. That’s the point. Every item here is a one-time cost, not a recurring one.
Common Mistakes That Sabotage a Plastic-Free Lunch Routine
Here’s where most people quit, and why.
Buying everything on day one: A full gear overhaul feels great for a week and then feels like clutter. Start with the sandwich wrap and the water bottle. Add the rest as the old plastic version wears out.
Skipping the labeling step for kids: An unlabeled container is a container that doesn’t come home. That’s not a zero-waste failure, it’s a logistics failure, and it’s completely avoidable.
Assuming glass survives a backpack: It usually does, but not always. If your kid’s lunch box takes a beating, start with steel and add glass once you know how careful the routine is.
Microwaving the wrong material: Beeswax wrap and most silicone lids aren’t built for a microwave. Transfer to a microwave-safe container first, always.
Not having a backup: One beeswax wrap, one water bottle, no spares, means the first time something’s still drying from last night, you’re back to plastic. Buy two of the small stuff.
Is It Actually Cheaper? The Real Cost Breakdown
Let’s do the math instead of guessing.
| One-Time Reusable Setup | Annual Disposable Spend | |
| Sandwich bags/wrap | $12-$18 (lasts 1+ year) | $15-$25/year in ziplock bags |
| Lunch box/containers | $20-$40 (lasts 3-5+ years) | $10-$20/year in disposable containers |
| Water bottle | $20-$35 (lasts years) | $50-$80/year in bottled water or juice pouches |
| Condiment containers | $10-$15 (lasts years) | $15-$25/year in single-serve packets |
| Total | $62-$108 upfront | $90-$150 every single year |
These figures are rough estimates based on typical U.S. retail prices, not a formal study. Your numbers will shift with brand and store. On these estimates, the break-even point usually lands somewhere inside the first year. Every year after that is pure savings, not counting what it saves in trash bags and landfill fees you’re not thinking about but are still paying for.
Here’s the truth nobody tells you: the “eco-friendly option costs more” line is one of the most common zero waste myths, and it doesn’t hold up once you look past the first purchase.
Quick-Start Checklist
You don’t need to do all of this today. You need to do the first two things today.
- Get one beeswax wrap or reusable pouch
- Get one insulated water bottle
- Get one bento-style steel or glass container
- Get a small set of leakproof condiment cups
- Get a travel utensil set (check thrift stores first)
- Label everything if it’s going anywhere near a school
Pack the lunch once, the plastic-free way. Then make it part of your plastic free morning routine and do it again tomorrow. That’s the whole system.